Your Tripod Is More Powerful Than You Think
A step-by-step tutorial on how you can use you tripod to make things disappear.

If you missed the previous post - How To Turn Your Tripod Into a Big, Expensive Light - I highly recommend hopping over to watch that video first. You can do that by clicking here.
So in the last post I showed you how you can turn your tripod into a big, expensive light and in this post I'm going to show you how you can use that same concept to do a couple of other really cool tricks:
(As always, I recommend watching the video because it includes more behind the scenes and some example videos, but if you prefer a non-video version, keep reading…..)
Step #1 - The Dilemma

Often times when working on a testimonial project where I don't get to choose the location - aka I'm stuck filming at someone's house - I tend to film on longer lenses and try to utilize close-ups for the main interviews in an effort to show the house less. This is usually for one of two reasons. Either their story has nothing to with their home (so the choice of filming in their home was by necessity and not by story motivation) or their home isn't photogenic and it would distract the viewer's attention away from the person and their story.
However, if you're more intentional with choosing your filming location, you can pick a space that is a vital part to the story or you can pick a space that accentuates the personality of the character on screen. In this particular example the location is visually communicating a few defining things about my wife - she's very positive, she loves bright, bold colors and she's a bookworm. Before she ever says a word on camera, the location and lighting is already telling the audience about our character and her story.
Now if I had chosen to use a long lens and get a close up, the audience would have lost a lot of that information, but instead I chose to use a wide angle lens and move the camera back to include her surroundings as part of her story. This also provides an opportunity to have fun with the frame. Here I chose to play with some symmetry and put her right in the middle of the frame and left tons of negative space above her head. I love this framing, but I've created a problem for myself.
Where am I going to put the boom mic?
Sure I could put a lav mic on her, but for the reasons I mention in the video above I don't like to mess with lavs. So at this point I'm stuck with two options:
I could boom from underneath the frame which would be like 3 feet away from her mouth.
I could boom from above the frame which would be like 4 feet away from her mouth. Either option is going to produce pretty bad sounding audio.
Step #2 - The Solution

In my previous post I showed you how you can re-light your scene by leaving your camera locked off on the the tripod, having your on-camera talent walk out of frame, adjusting exposure, and then filming a clean plate to layer on top of your interview footage. Well you can do the exact same trick (sans exposure change) to mask things out of your frame, like this boom mic.
For a step-by-step on how to do this in your editing software, watch the video at the top of this post.
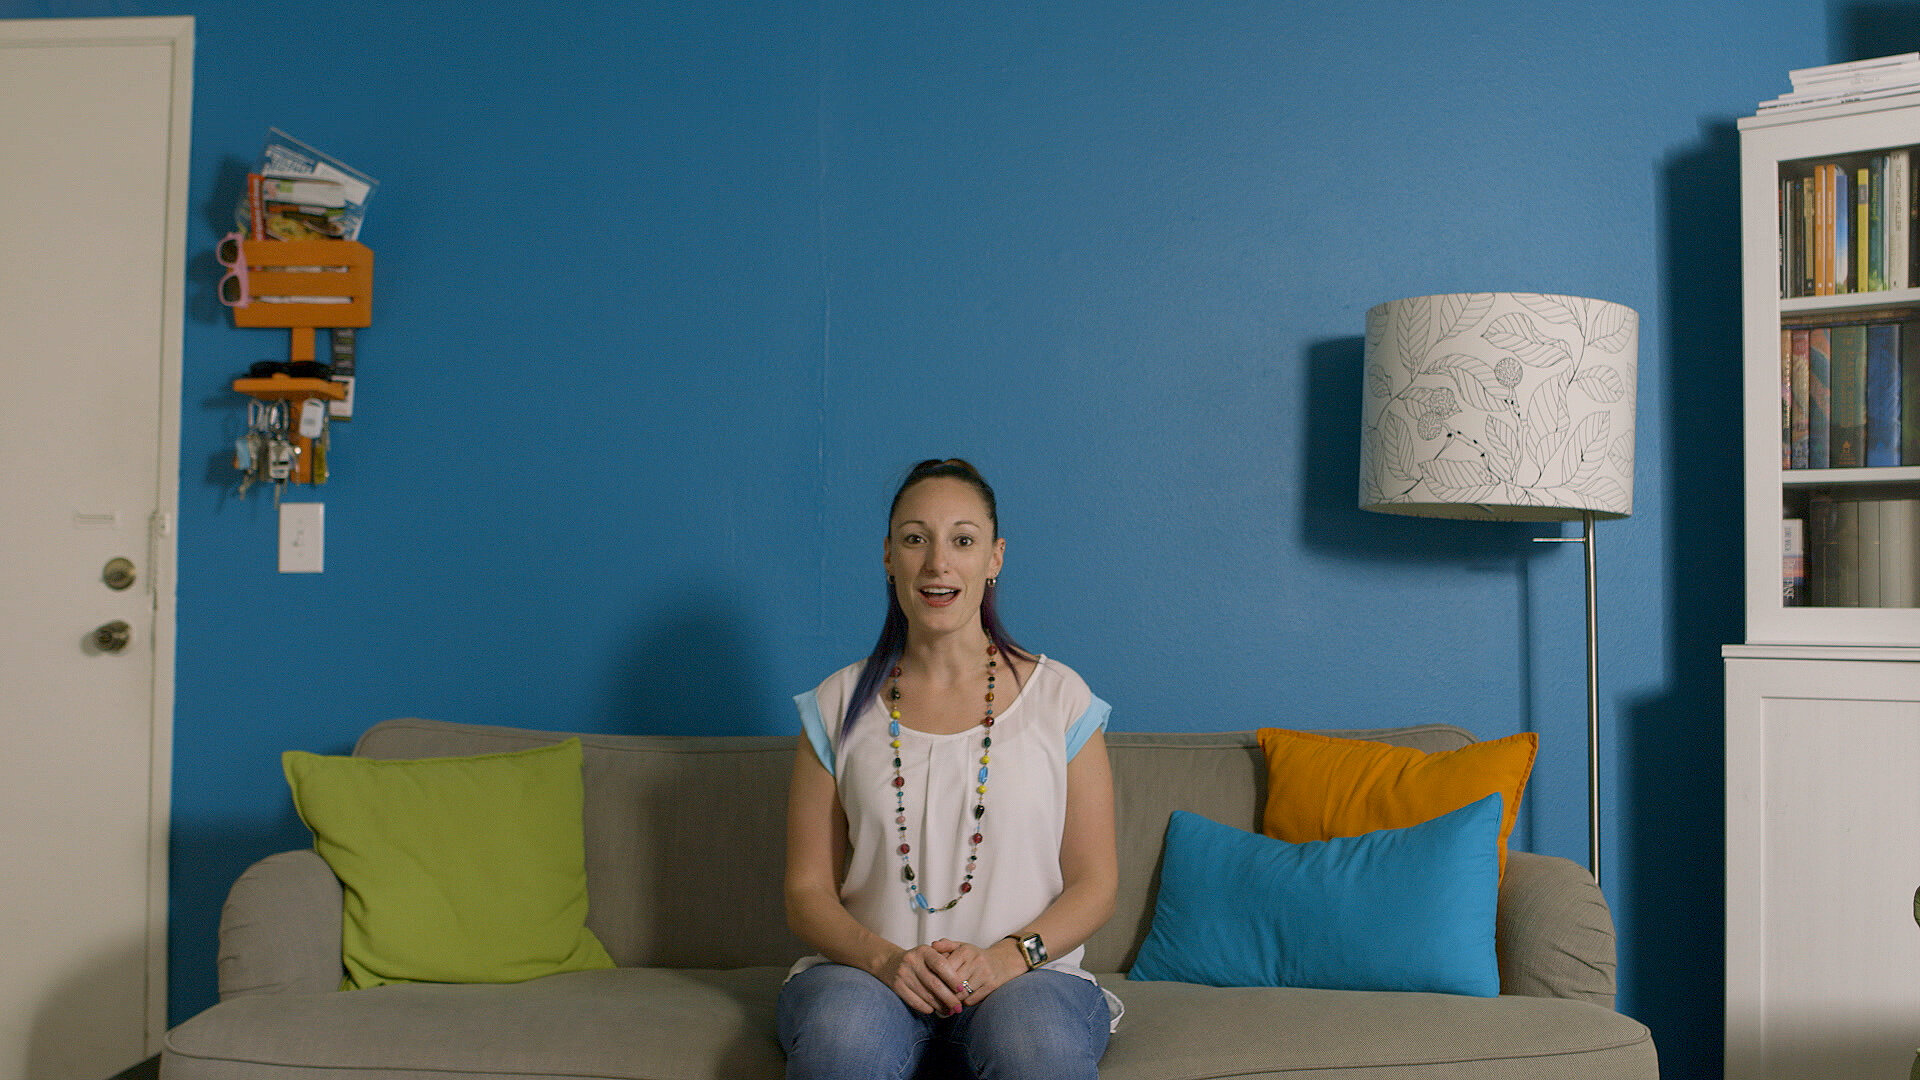
Before:
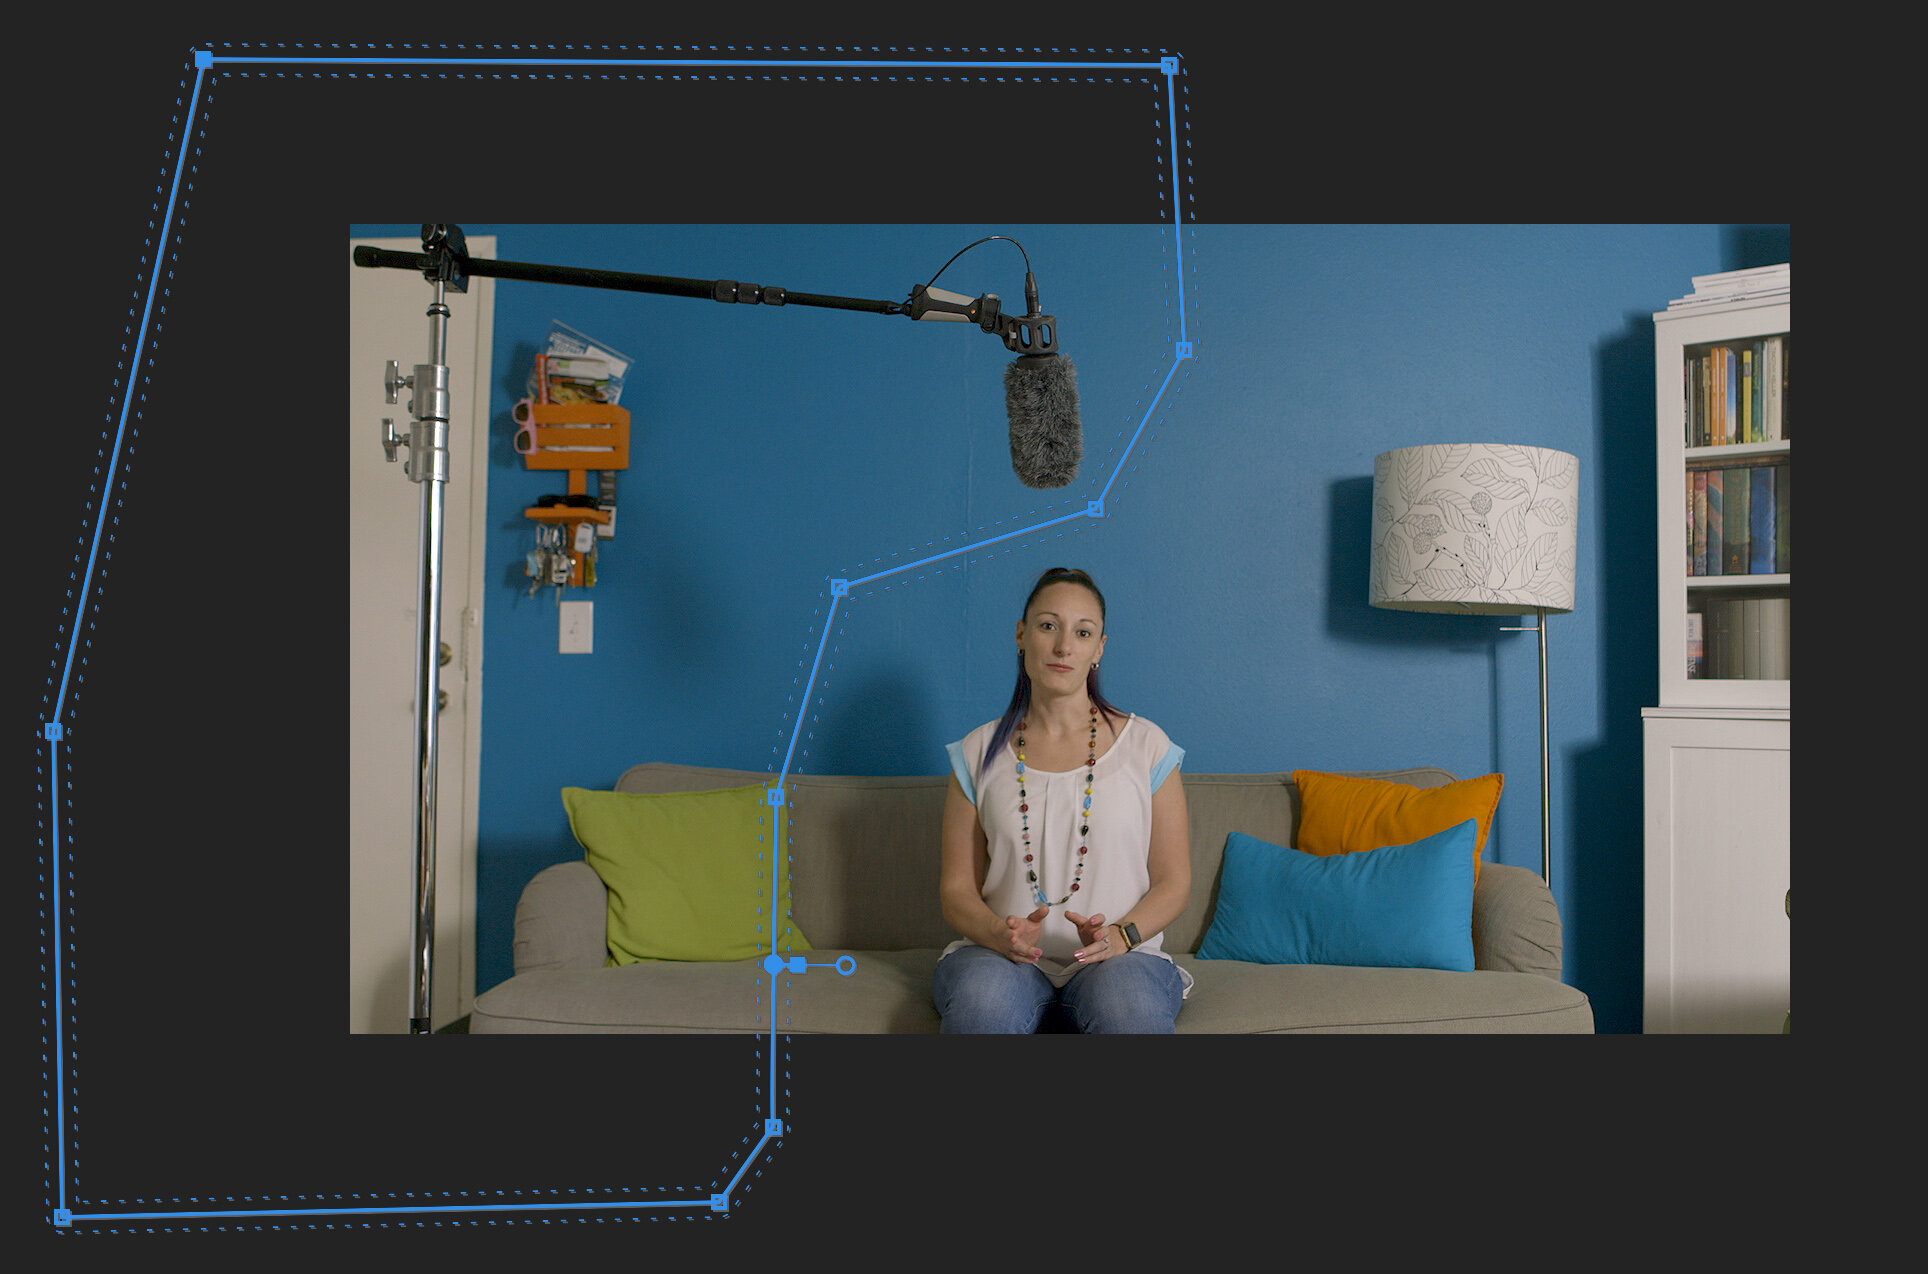
After:

As long as you DON'T MOVE YOUR TRIPODor move your lens (if you're on a zoom lens) AND you leave enough room between the person and the object you're masking out - in this case the boom mic - you're good to go. If you don't do one of these things, you're going to have a headache on your hands (and a newfound love of B-Roll!).
Step #3 - Taking this trick one step further
When you shoot this wide of a master shot, not only does it introduce problems with getting the microphone close enough to the talent, it also limits your choices for how close your 2nd shooter can get to compose a nice close-up angle to cut to in the edit. If you have a long enough lens, you can always back out of frame and still get a close up, but if you don't want that flat of a shot (the longer the lens, the flatter the image will feel) or if you don't have a lens that's long enough, you can just have your cinematographer join the party:

And then just like we did with the microphone earlier, we can mask the cinematographer out of the shot as well:
And then in the edit we can cut to this close up (shot at 50mm) that feels way more dynamic because it's physically closer to the person telling their story and because it's still full of fun, bright colors that would have gotten framed out of the shot on a longer lens:

Conclusion
While there is some inherent risk in doing this trick (aka someone forgets and moves the tripod during the interview 😳), by utilizing your tripod you can open yourself up to a whole new set of possibilities. This is especially handy when you want to capture two great angles for an interview, but you only have one shooter - or if you don't have a lavaliere mic (or don't like to use them like me).
*Note: This particular version of the trick works best if you are filming in a location where the lighting in the room won't be changing. If you are filming in a location that has a ton of natural light and there is a chance that the lighting might change while filming (the sun comes out or clouds roll in) I'd recommend finding your frame for your master wide shot and then film a clean plate before your interview and then again at the end of your interview. That way you have two options to choose from in editing when doing this trick & hopefully with a little color correction and B-Roll edited in, nobody will notice any inconsistencies.
JOIN CHURCH FILMMAKERS FROM ALL OVER THE WORLD
Enter your first name and email below and you'll get exclusive tips, tricks, and trainings delivered straight to your inbox. As a bonus for signing up I'll send you our favorite filmmaking trick that I use on every testimonial film I create.