Cinematography Breakdown: Pastor Promotional Video
A detailed look into how we created the set design and cinematography for this promo video with Pastor Miles McPherson.

Before we get started, check out the finished promotional video so you can see what I'm talking about:
And now for a detailed breakdown of the project:
B-ROLL
For this particular promotional video we knew that there wasn't going to be a ton of B-ROLL, so it was important that the set up for the on-camera talent was really well done (because that's basically what the viewer was going to be looking at for the next 2.5 minutes.).
If there's going to be a lot of B-ROLL sometimes I'll opt for a more controlled environment where we can ensure better sound since most of the talking is going to be covered up by visuals, but when there's not going to be a ton of B-ROLL I'll spring for a more visually interesting environment even if that means that it's less controlled and might be a bigger pain in the butt dealing with.
Filming Location
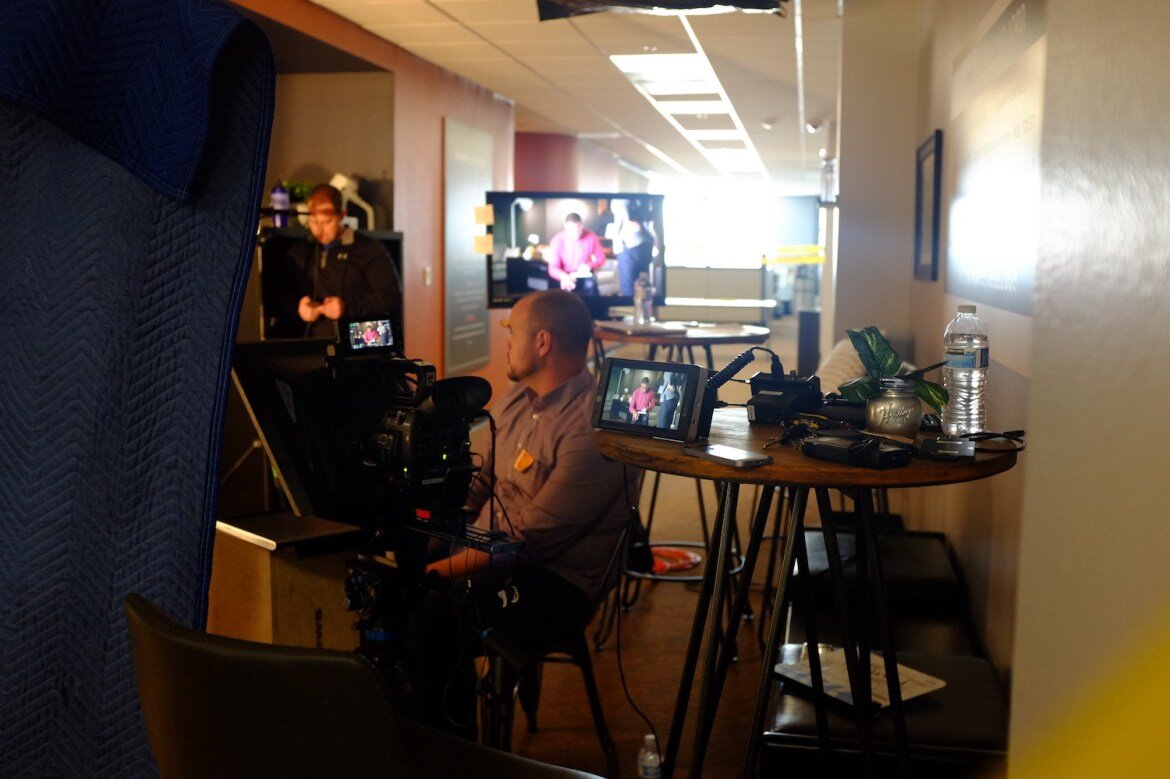
With the help of some key stakeholders ensuring a mostly quiet set, we posted up right in the middle of the church offices (which is usually very noisy).
There were two walls behind Pastor Miles, but the rest of the room was wide open to the rest of the 50+ office cubicles which meant that any sound in the area would travel pretty easily. It was a little dicey to try filming there, but it actually worked out great.
Not only did we benefit from the newly designed section of the offices which provided great visuals for us, but everyone kept super quiet in the office while we were filming.

Set Design
After we figured out what our frame was going to be and where we wanted Pastor Miles to sit, we started moving some furniture and lights in the background to complement our framing.
Since the walls were a little dark, I wanted to make sure that we used the practical lights in the background to create brighter spots and nice gradients so it wasn't just a flat, grey wall. I also wanted to make sure that the part of the wall directly behind Pastor Miles' head was lighter so his head wouldn't blend into the background.
The light bulbs that were in the lights were those gross LED bulbs, so we took them all out and replaced them with soft white incandescent bulbs and then put the lamps on a dimmer so we could control the amount of light and also warm up the color temperature.
I also used a Black ProMist 1/8 filter on my camera which created the soft glow around the lights that you see in the frame's right side. This filter also lowered the contrast of the entire frame just a little bit and made the skin tones just a little smoother as well.
Lighting & Grip
After we had the background dialed in, we set up our key light. As is my usual modus operandi, I created a big, soft source to light our on-camera talent.

For this we used the church's Dracast LED Fresnel lights which are about a 1K equivalent (tested side by side with Arri 1K fresnels, I think the Dracast is closer to about 800 watt equivalent...). Since they are LED they are already a little softer than traditional tungsten fresnels, but I like to make lights as soft as I can so we put them through some additional diffusion.
One lamp we put a soft box on to soften the light and spread the beam wider and since we didn't have a softbox for the other light (which I would have preferred) we just doubled up the diffusion in front of it.
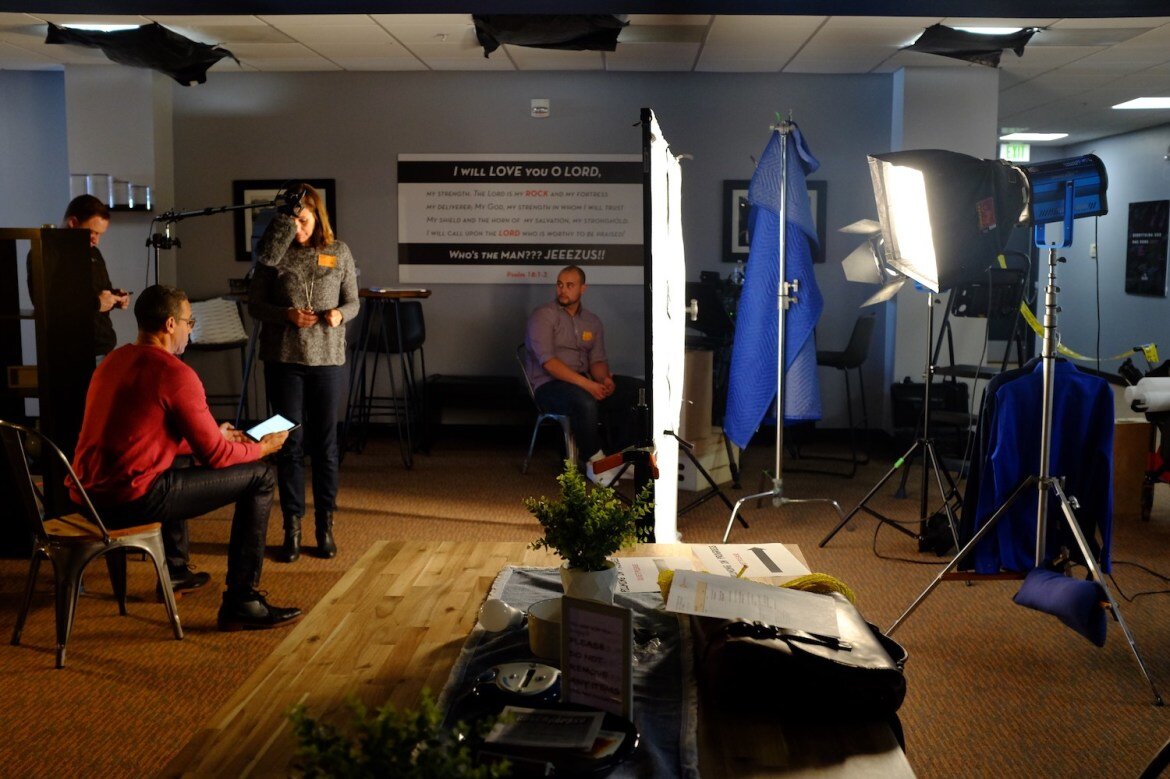
For our main source of diffusion we set up a 6' x 6' Scrim Jim with a 1/4 stop silk.
The goal with this big of a diffusion is to get the lights to evenly light the entire area so your key light transforms from a Fresnel light that's kind of spotlight-esque, to a giant, soft 6' x 6' light. By creating this big of a soft source of light, you will create a light that is very flattering to the skin and it will gently wrap around the face of your on-camera talent.

As you can see in the frame grab above, the light creates a beautiful and natural looking gradient across Pastor Miles' face. The contrast is low, but there's still shape and visual interest there.
Another perk of using such a big soft source is that you can light more from the side instead of straight on which helps create that shape of light, but also (and this is a huge perk....) it adds a nice twinkle of light in both eyes without having any glare at all on his glasses which is like the holy grail when it comes to filming someone with glasses.

One last thing that I forgot to mention in the video (so kudos to you for reading down this far!) is that we also covered up all of the gross fluorescent lights in the ceiling of the walkway back by where our camera was.
I'm all about saving the environment, but cover those bad boys up when you're filming!
If we hadn't covered them up, we would have gotten some weird mixed color temperature lighting on Pastor Miles that would have most certainly had that signature fluorescent green look to them.
Well I think that wraps it up for this cinematography breakdown. If you have any questions, shoot me an email or hit me up on Instagram.
JOIN CHURCH FILMMAKERS FROM ALL OVER THE WORLD
Enter your first name and email below and you'll get exclusive tips, tricks, and trainings delivered straight to your inbox. As a bonus for signing up I'll send you our favorite filmmaking trick that I use on every testimonial film I create.